How to crochet a Mountain Poppy

The mountain poppy is a flower that with its bright yellow constitutes one of the most beautiful ornaments of the rocky ridges.
It has a very extensive root system that also acts as a fixator especially in landslide areas.
It has a very extensive root system that also acts as a fixator especially in landslide areas.
The mountain poppy is the first flower that is part of the composition of alpine flowers.
To make the crochet mountain poppy you need to prepare the section of petals, the pistil, the bud and the leaf.
Needed: cotton number 10 and number 20 - 1.0 mm crochet hook - 0.45 mm galvanized iron wire - scissors - plasticized iron wire - pliers - cotton wool. For the leaves use cotton number 10, for everything else number 20.
Explanation of the section of petals
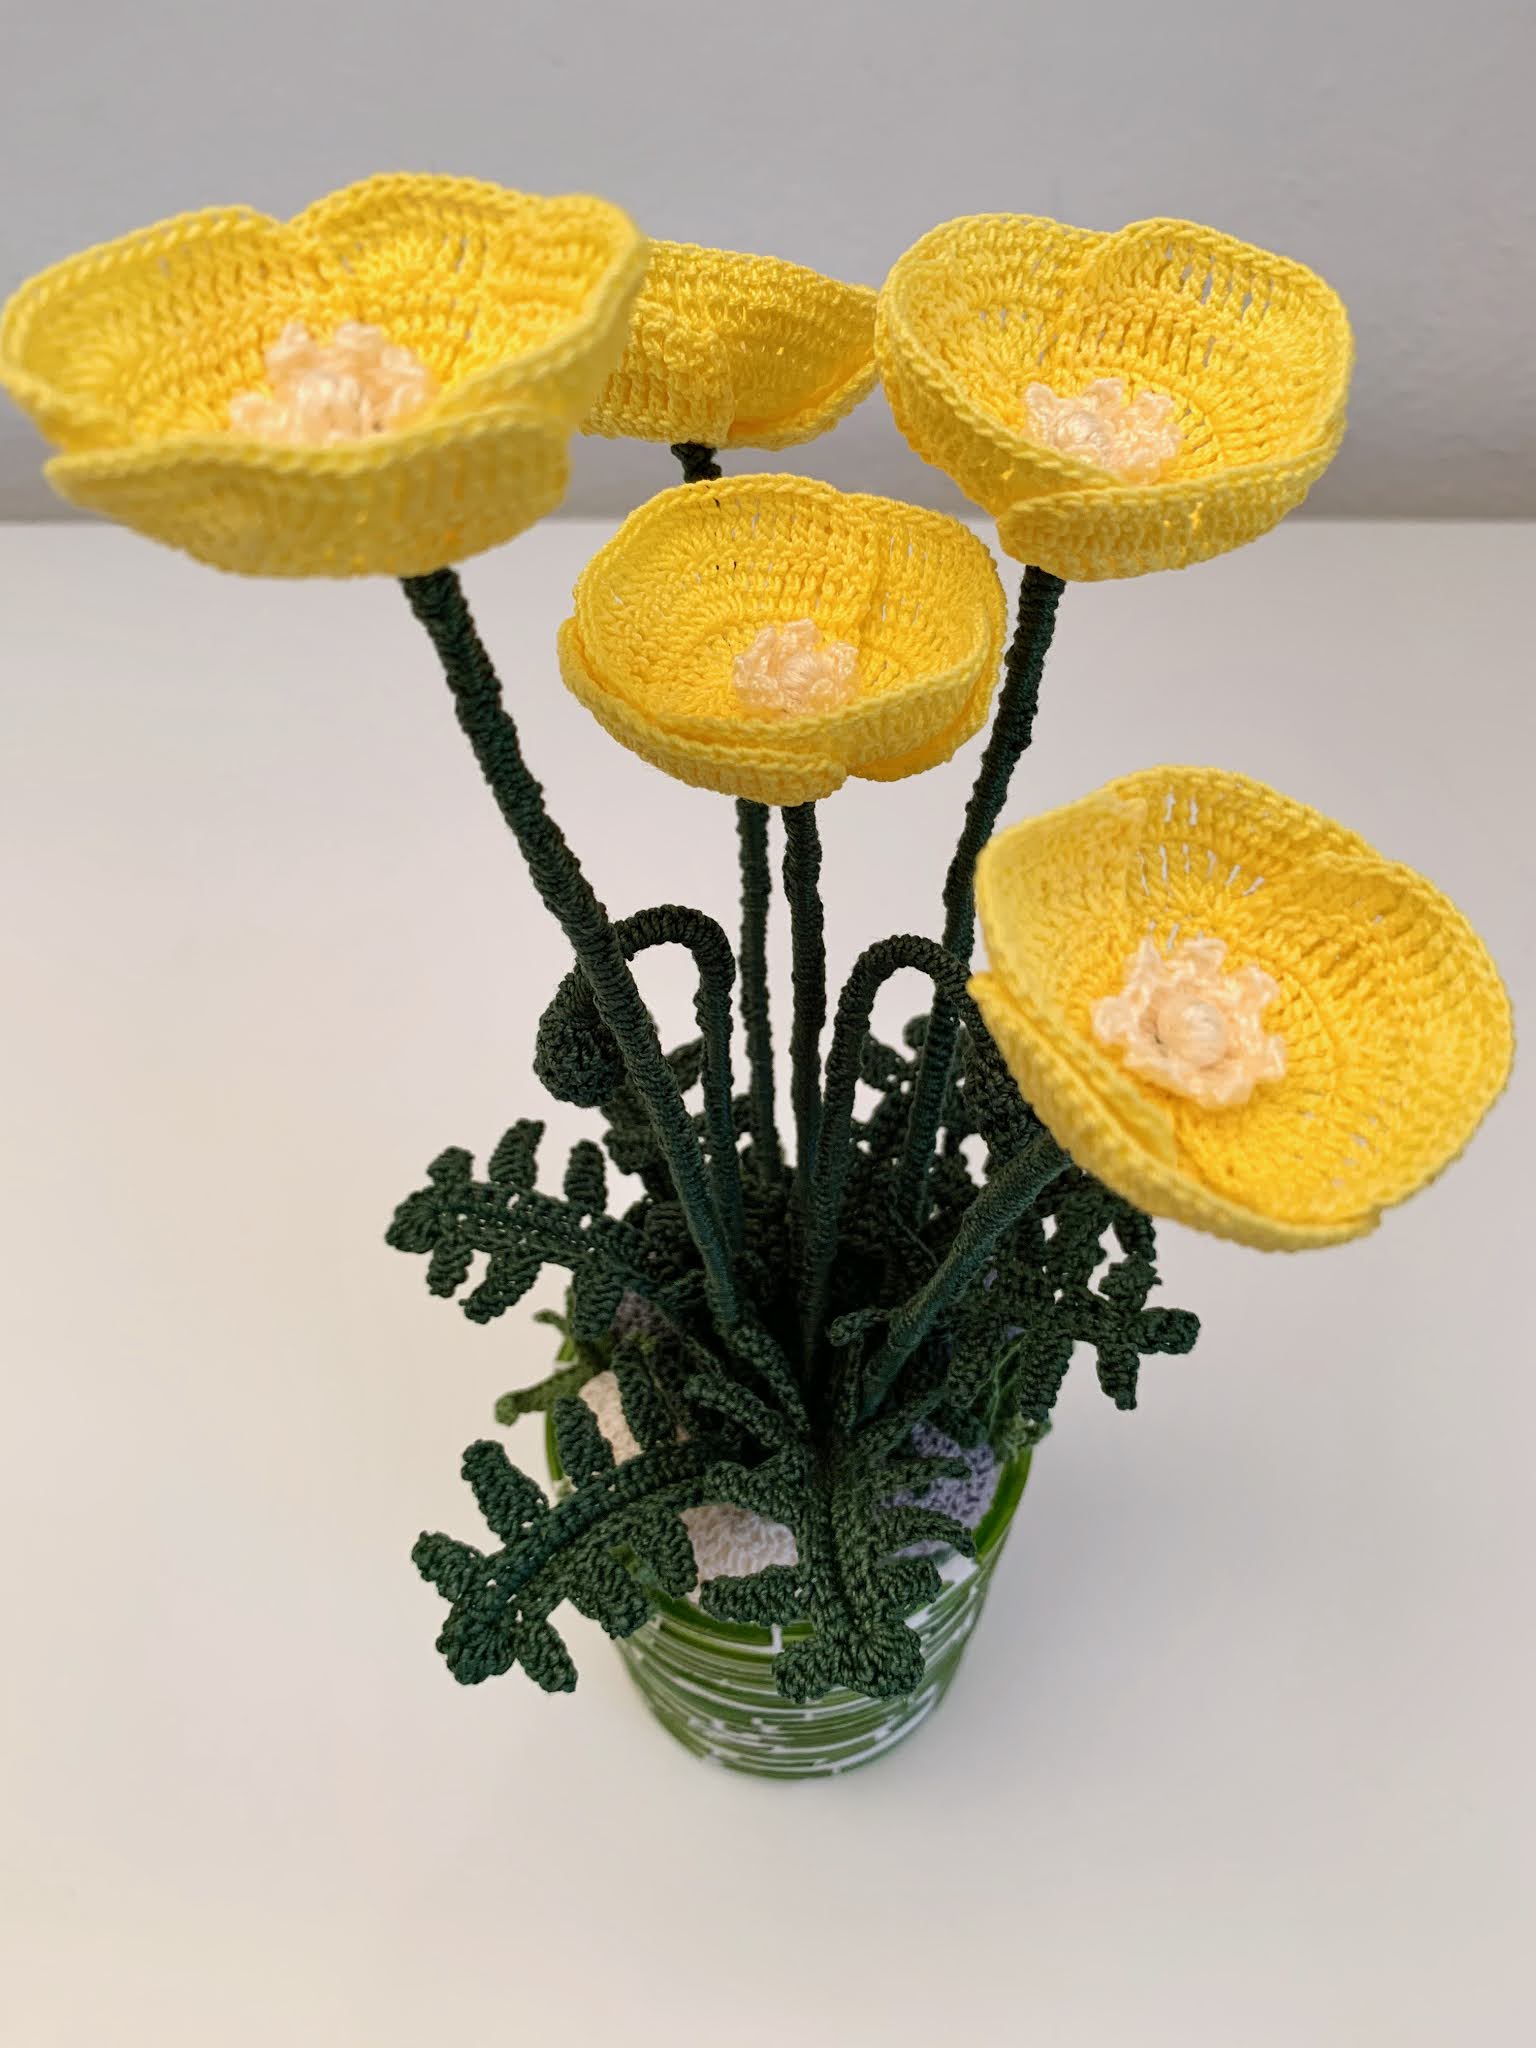
Start 5 chains and close them in a circle.
1st round: 10 single crochet. 2nd round: 2 double crochet in one point 5 times. Turn the work. 3rd round: 2 double crochet, 2 triple crochet in one point 6 times, 2 double crochet. Turn the work. 4th round: 2 double crochet, 5 triple crochet, 3 triple crochet in one point twice, 5 triple crochet, 2 double crochet. Turn the work. 5th round: 2 double crochet, 7 triple crochet, 3 triple crochet in one point twice, 7 triple crochet, 2 double crochet.
Go down with slip stitch up to the 10 single crochet and make another petal the same.
Make 2 sections for each flower. Model with your hands.
Explanation of the pistil

Start 4 chains and in the first make 13 double crochet (total 14). Every 2 stitches make a picot of 2 chains.
Cut a piece of plasticized iron wire of the appropriate length and thickness for the work being carried out. On one tip, wrap a little cotton (same shade used for the pistil) to create a ball.
Curve the tip 2 times to block the cotton (with the help of pliers). Insert the pistil and the two sections of petals into the stem, alternating their position. Cover the stem with cotton by working the chains around it, except about 3 cm that will be inserted into the vase.
Explanation of the bud

Start 4 chains and in the first make 9 double crochet (total 10).
1st round: 10 double crochet.
2nd round: 2 double crochet closed together for the whole round. Cut a piece of plasticized wire of the appropriate length. On one tip, wrap a little cotton wool.
Curve the tip 2 times to block the cotton and create a ball. Insert it inside the bud and close the second round.
3rd round: 2-3 slip stitch.
Cover the stem with cotton by working the chains around it, except about 3 cm that will be inserted into the vase.
Explanation of the leaf

Start 25 chains.
Cut a piece of galvanized iron wire that goes around the complete circle of the chains plus another 3 cm more on each side.
Insert it to them by working around 24 single crochet on one side and 24 single crochet on the other.
1st round: 3 slip stitch. 1 slip stitch, 8 chain stitches and in these make: 2 single crochet, 2 half double crochet, 3 double crochet, 1 slip stitch. Repeat the same for 2 times. 1 slip stitch, 6 chain stitches and in these make: 1 single crochet, 2 half double crochet, 2 double crochet, 1 slip stitch. 3 slip stitch. 1 slip stitch, 6 chain stitches and in these make: 1 single crochet, 2 half double crochet, 2 double crochet, 1 slip stitch. 2 slip stitch. 1 slip stitch, 4 chain stitches and in these make: 1 single crochet, 1 half double crochet, 1 double crochet, 1 slip stitch. In a single stitch do: 1 single crochet, 1 half double crochet, 1 double crochet, 1 triple crochet, 1 double crochet, 1 half double crochet, 1 single crochet. Repeat the same as the other side in reverse, then start from 1 slip stitch, 4 chain stitches and in these make: 1 single crochet, 1 half double crochet, 1 double crochet, 1 slip stitch.
Stretch the leaf well by shaping it with your hands. Twist the remaining wire on itself to obtain a small stem that will be used to insert the leaf into the vase.
Make all the leaves you need for your composition.
Arrange the flowers with a few buds in the center of the vase and all around the leaves.
Model everything with your hands.
As always I hope to have been clear in the explanation and to have given you an extra idea.
Hello everyone to the next creation.


Commenti
Posta un commento