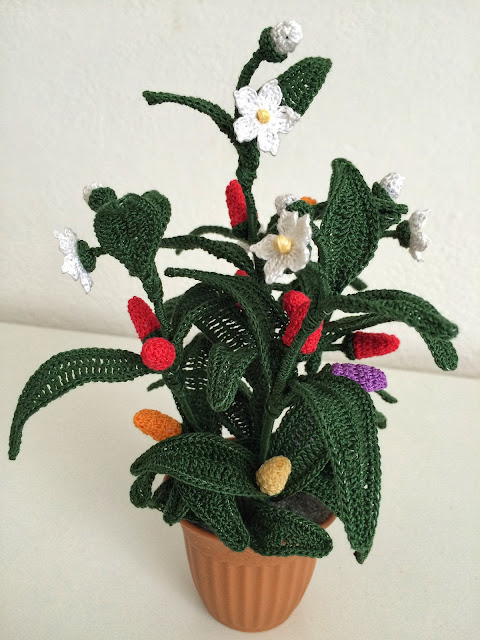
How to crochet a Chili Pepper
The most used spice in all the kitchens of the world that
with so much heat gives that brio more to all dishes. Not only useful but also
beautiful, the pepper plant is in fact also very decorative. To make this
crochet seedling, I was inspired by those in the garden and now I have the
pleasure of sharing it with you. To achieve it, it is necessary
prepare the little flowers, the little buds with their
glasses, obviously the peppers of various colors and the leaves with the stem.
Explanation of the flower.
Start 6 little chains and close in a circle.
1 round: 3 little chains, 3 double high points (in the
second, make a chain and a slip stitch to get a pippiolino) 2 little chains, a
slip stitch inside the circle.
Redo equal for a total of 5 times.
Now cut a piece of galvanized iron wire and in the center
wrap several times of the yellow cotton to form a small ball that will be the
pistil of the flower, twist the wire on itself to stop the cotton and continue
for 2-3 cm for create a small stem, the remaining wire will be used to tie the
flower to the main stem.
Explanation of the bud.
Start 4 little chains and in the first step: 9 double
crochet (total 10)
1 lap: 2 double crochet closed together for the whole lap.
Before closing the lap, cut a piece of plasticized wire of the length needed to
make the stem and bend a tip twice (help yourself with a forceps) to form a
small ball. Now insert the stem inside the bud and close the first turn.
2 round: with 2-3 slip stitch close the work.
Explanation of hot pepper.
Start 4 little chains and in the first make 11 double
crochet (total 12)
1-2 turn: 12 double crochet, before closing the 2 lap cut a
piece of galvanized iron wire and in the middle put a small ball of cotton wool
or cotton wool, make a knot with the galvanized iron wire to stop it and twist
on himself the wire to form a small stem of about 3 cm. Now insert it inside
the chili pepper and close the 2nd turn.
3 lap: 2 double crochet closed together for the whole lap.
If you see that the padding is little add another hour.
4 lap: with 2-3 slip stitch close the work.
Explanation of the glass.
The glass is always the same for the flower, for the bud and
for the chili and should not be sewn.
Start 4 little chains and in the first make 9 double crochet
(total 10).
Close the job.
Now let's move on to the leaves that are of 2 different
sizes.
Explanation of the small leaf.
Start 20 little chains.
1 lap: 2 single crochet, 2 half double crochet, 2 double
crochet, 4 triple crochet, 2 double crochet, 2 half double crochet, single
crochet. Redo equal to the other side of the chains.
Cut a piece of galvanized iron wire 2 sheets in length plus
a few cm more and insert it to the leaf by working around the single crochet.
Tighten the leaf well and twist on itself 2-3 times a piece of wire, now we
work the second leaf that will be joined to the first through the wire and
therefore we will make 20 little chains and the first lap we will start it
upside down that is, from the 5 single crochet. After the first lap we go down
with slip stitch until the beginning and insert the other piece of wire to the
second leaf always working around the single crochet. Close the work leaving 2
pieces of extra wire that will allow us to connect the leaves to the main stem.
Explanation of the big leaf.
Same identical procedure of the small leaf, change only the
points that are: 30 initial chains and in these to do: 2 single crochet, 2 half
double crochet, 2 double crochet, 12 triple crochet, 2 double crochet, 2 half double
crochet, 7 single crochet. Redo equal to the other side of the chains and then
follow the same procedure as the small leaf.
Now that you have prepared everything, fasten the flowers,
the peppers and the leaves to the main stem and then work on the chains once on
the right and once on the left of the stem to cover it with cotton.
I hope as always to have been clear in the explanations and
to have given you one more idea. Have fun creating with all the colors that
your imagination suggests.
Hello everyone, see you next time.


Commenti
Posta un commento