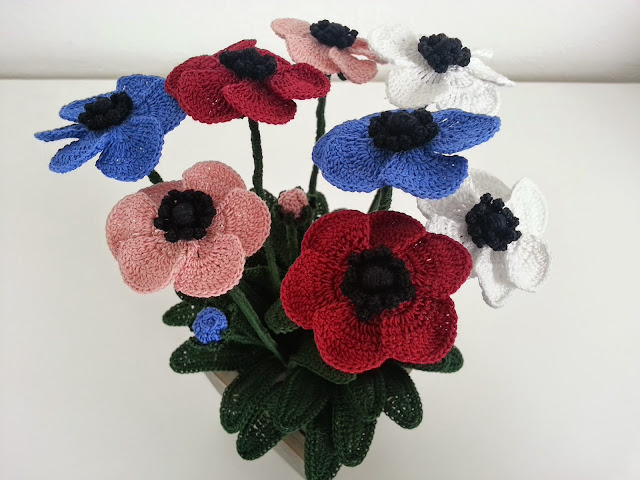
How to crochet a Anemone
Its name means flower of the wind perhaps for the short
flowering period or for the delicacy of its petals. Beautiful lively flower
that delights every garden. So I liked that I wanted to recreate this crocheted
flower. There are so many different varieties and shapes of anemone, I really
liked this with its beautiful colors. Let's go straight to the explanation.
Needed: cotton number 20 - 1.0mm crochet hook - scissors - 0.45mm galvanized iron wire - plasticized iron wire - pliers.
Explanation of the flower
Explanation of the flower
1 lap: 12 single crochet.
2 lap: 3 triple crochet in one point for 2 times
Turn the work and make: 1 triple crochet, 2 triple
crochet at one point, 3 triple crochet in one point for 2 times, 2 triple
crochet in one point, 1 triple crochet.
Turn the work again and do it: 2 single crochet, 1
half double crochet, two double crochet in one point, one triple crochet, two triple
crochet at one point twice, one triple crochet, two double crochet in one
point, a half double crochet, 2 single crochet.
Get small points down to the circle of single crochet and
repeat the same for a total of 6 petals.
Explanation of the frangi pistillo
Start 7 chains and close in round and inside to make: 5
chains and in these make 4 single crochet then a single crochet in the
chainring. Repeat the same for a total of 12 times.
Explanation of the chalice:
1 lap: 12 double crochet.
2 laps: 5 chains and in these make: 2 single crochet, 2 half double crochet, skip a base point, 1 slip
stitch. Repeat the same for a total of 6 times.
Explanation of the bud
Start 5 chains in the round and inside to do:
1 lap: 12 double crochet.
2 lap: 18 double crochet (increase one point every 2 points)
3 lap: decrease one point every 2 points.
4 revolutions: Insert the plastic wire (previously cut and
bent 2-3 times on the tip to form a ball, help with a clamp) and close the rim
at small points.
Now cut the iron wire of the length that you need according
to your composition, then wrap a bit of black cotton several times to form a
kind of ball, then bend the stem to lock the cotton (always help with a clamp),
this will be the central pistil that will pivot and hold it all. Now put in
order: the frangible pistil, the flower and the cup without sewing it and then
work around the stem for the chains to dress it with cotton. Remember to keep
those 3-4 cm stems uncovered that will be what you will have to put in the jar.
Same procedure for the bud. If the petals do not remain beautiful, you have to
fix them a bit, much depends on the type of cotton you use. Now let's go to the
leaves that I made of 2 different sizes to give more naturalness to the whole.
Explanation of the large leaf
Start 35 chains and do these: 3 single crochet, 3 half double crochet, 3 double crochet, 16 triple crochet, 3 double crochet, 3 half double crochet, 3 single crochet, resume identical to the other side. Now cut a piece of zinc plated wire of the length of the leaf plus about 4-5 cm in height and work around the single crochet. Spread the leaf well to give it the right shape and twist the remaining iron wire to form the jacket that will serve to insert the leaf into the jar.
Explanation of small leaf
Start 25 chains and do this: 3 single crochet, 3 haldìf
double crochet, 3 double crochet, 6 triple crochet, 3 double crochet, 3 half double
crochet, 3 single crochet, equal to the other side. Continue with the same
procedure as the other leaf.
Make all the leaves you need to complete your composition.
The larger ones try to put them in the middle near the buds and the smaller
ones a little more externally in order to give more naturality to the whole
set. I always hope to have explained everything to the best and to have helped
you create your crocheted flower jar that will color a corner of your home. Hi
everyone and next.


Thank you so much for the crochet beautiful flowers.
RispondiEliminaHi Sharon, you're very kind. Thank you very much!
EliminaVery nice easy to follow Maureen
RispondiEliminaHi Maureen, tank you very much very kind😊
Elimina