Crochet bracelet explanation: Intrecci
A simple crochet bracelet designed to be worn when you want without keeping it always on your wrist thanks to the insertion of buttons, suitable for all ages and for all occasions, it can in fact be customized with all the beautiful ideas that your imagination suggests, simply by changing the colors or their combinations or even the inserts to sew on them.
The explanation is adapted to the size of my wrist (about 17 cm).
Needed: cotton number 20 - crochet 1.0mm - scissors - needle - transparent plastic snap buttons.
Explanation

Start 15 chains.
1st round: 15 double crochet, turn the job and work the same for a total of 37 laps. Close the work keeping the cotton a little long, fold the cuff in half and sew the edges. At 2 ends sew the transparent plastic snap buttons. The bracelet is now ready to be customized with other inserts.
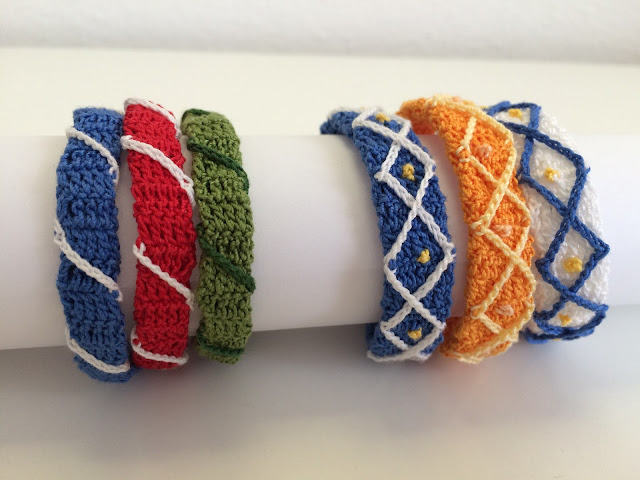
I customized it with these diagonal weaves that then created small diamond shapes.
At the ends of the bracelet sew the buttons.
Explanation of the plot
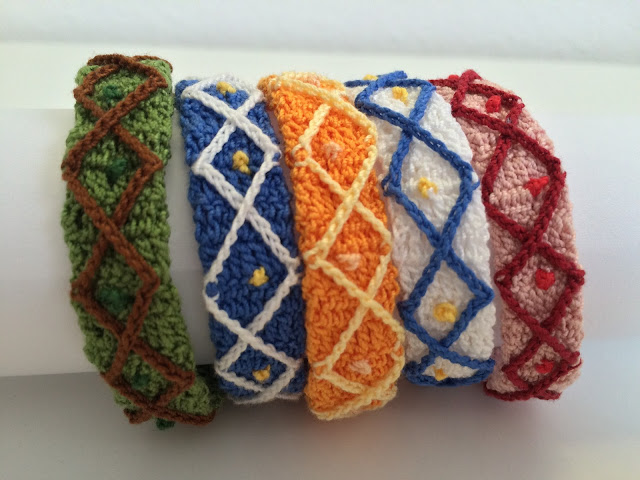
Point the crochet hook in a corner at the bottom and make 9 chains, count 3 turns of double crochet and at the opposite side point the crochet hook and make a union chain. Redo the same for the whole length of the bracelet, first on one side and then on the other, the small rhombuses will form. If you want to add another small bit of color, insert the needle and in the center of each rhombus sew knots 2-3 times.

The explanation of the next bracelet is almost identical to the previous one, there is only some variant in the points.
Explanation

Start 11 chains.
1st round: 9 double crochet, turn the job and continue for 37 laps.
Continue with the same procedure as the previous bracelet.
In this I changed the weaving of the chains that instead of creating a rhombus will have the shape of a spiral.
Explanation of the insert

Point the crochet hook at one end, make a chain of joins and then 7 chains, every 2 turns of double crochet on the opposite side insert the hook and make another union chain. Turn the bracelet and make the same again following the shape of the spiral until you reach the other end of the bracelet.
At the ends of the bracelet sew the buttons.
I hope I have explained everything to the fullest and have given you an extra idea for your creations.
See you soon. Bye!


Commenti
Posta un commento