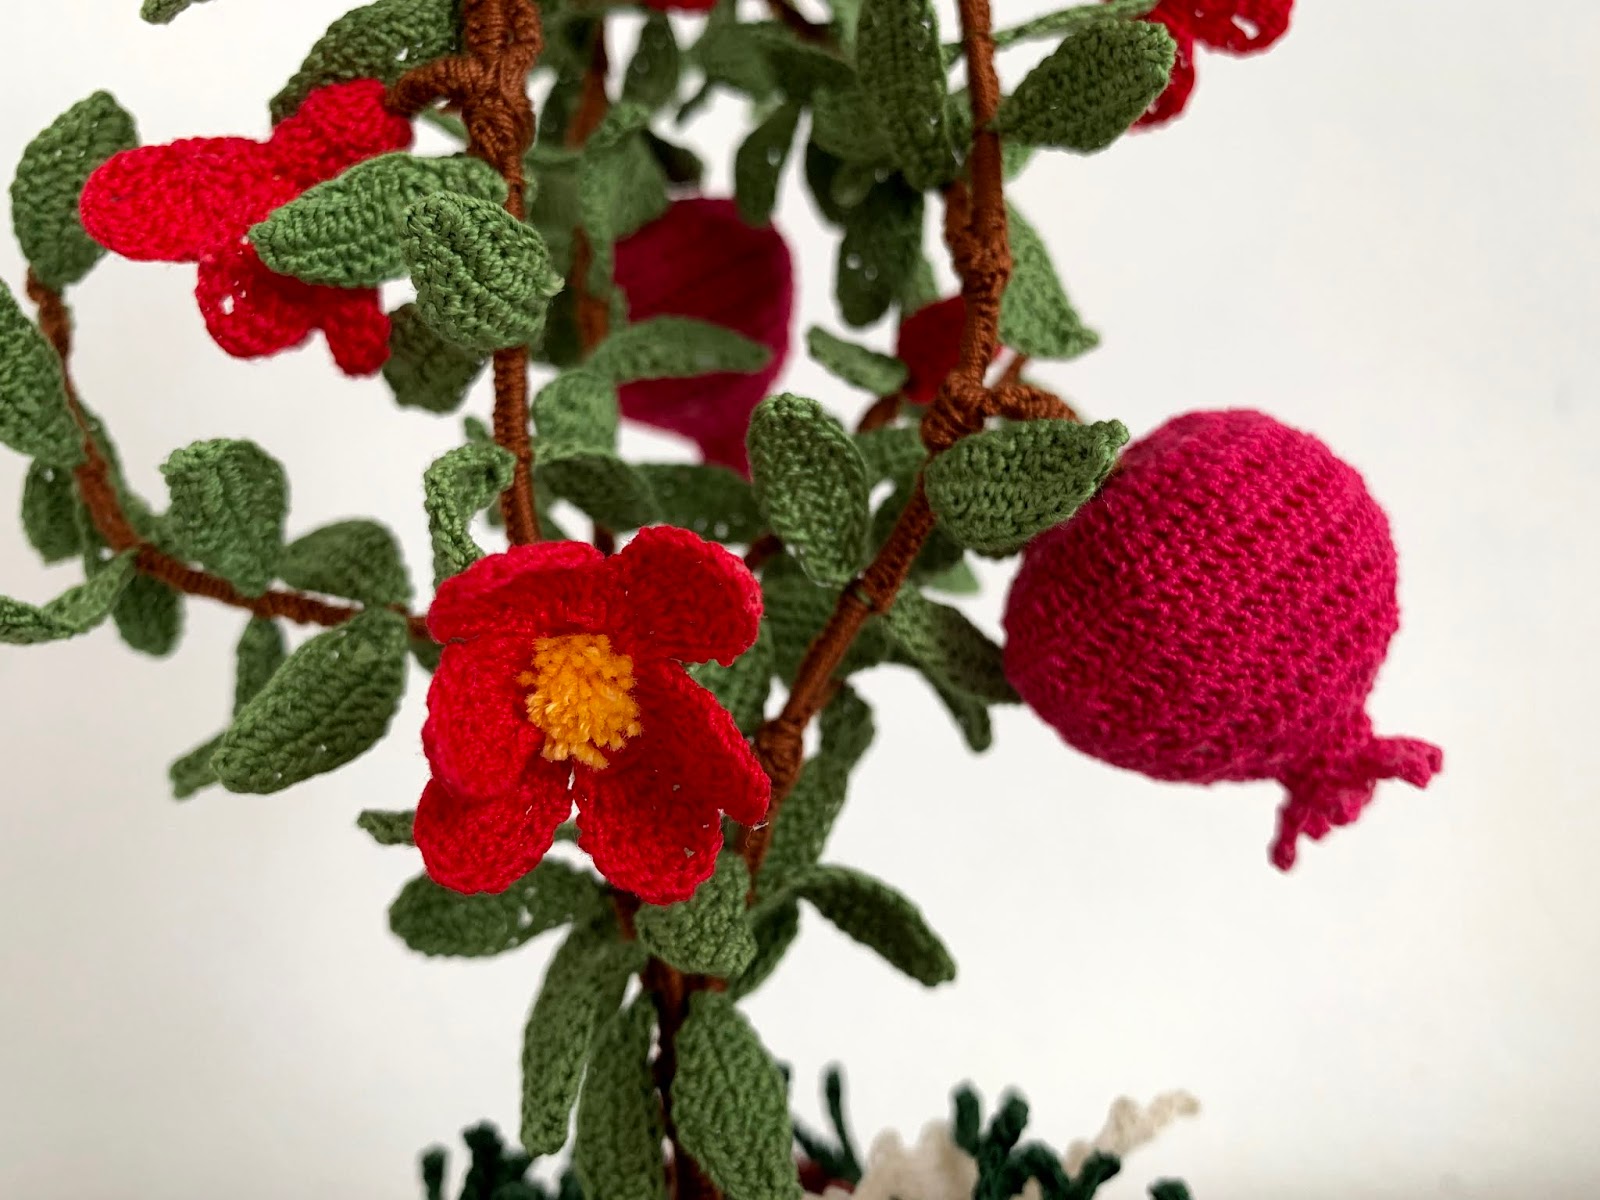
How to crochet a pomegranate

To make the crochet pomegranate, prepare the fruit, the flower, the pistil, the bud and the leaves.
Needs: cotton number 20 - crochet 1.0 mm - scissors - needle - galvanized iron wire 0.45 mm - cotton wool - plasticized iron wire - pliers.
Explanation of the fruit

Start 4 chains and in the first make 11 double crochet (total 12).
1st round: 24 double crochet.
2nd round: 48 double crochet.
3rd round: 60 double crochet (increase every 4 points).
4th and 5th round: 60 double crochet.
Lap 6: 1 double crochet, 2 double crochet closed together. Repeat the same for the whole lap (60 points will remain from 40).
7th lap: 40 double crochet.
Cut about 10 cm of galvanized iron wire, wrap a little cotton in the middle, twist the wire on itself for about 1 cm and insert it into the fruit. Stuff with more cotton wool to fill the space.
Lap 8: 1 double crochet, 2 double crochet closed together. Repeat the same for the whole lap (from 40 there will remain 21 double crochet).
Lap 9: 2 double crochet closed together for the whole lap, except the last 2 points (from 21 there will be 12 double crochet). Continue to stuff.
10th lap: 12 double crochet.
Lap 11: 5 chains and in these do: 2 single crochet, 2 half double crochet. Skip a base point, 1 slip stitch. Repeat the same for a total of 6 tips.
If it is necessary to continue filling and shaping with your hands to obtain the shape of the fruit.
Explanation of the flower
1st and 2nd round: 12 double crochet.
3rd round: 2 chains and 1 double crochet in a point, 1 double crochet and 1 half double crochet in 1 point. Turn the job around.
4th round: 2 chains, 2 double crochet in one place twice, one half double crochet. Turn the job around.
5th round: 2 chains, 1 double crochet, 2 double crochet, a high point, 1 half double crochet. Get off with slip stitch up to the round of 12 double crochet. 1 slip stitch. Repeat the same for a total of 6 petals.
Explanation of the pistil

Explanation of the bud

Start 4 chains and in the first make 11 double crochet (total 12).
1st and 2nd round: 12 double crochet.
Cut about 30 cm of galvanized iron wire, fold it in half and wrap a little cotton in the middle. Twist the wire on itself to block the cotton wool and continue twisting to create a small branch of about 8 cm. Insert it into the bud.
3rd round: 2 double crochet closed together for the whole lap.
4th round: 1-2 slip stitch and close the job, hold on.
Explanation of the leaf

Start 12 chains.
1st round: 2 single crochet, 2 half double crochet, 3 double crochet, 2 half double crochet, 2 single crochet. Repeat the same on the other side of the chains. A chain, (it will be used to insert the copy of leaves in the branch). Make another identical leaf without cutting the cotton.
The pomegranate seedling I made is composed of 3 main branches. In these the fruits and the flowers plus 3-4 secondary branches, someone with the bud and some without will then be tied.
To make the secondary branch only with the leaves, cut about 30 cm of galvanized iron wire, fold it in half and with the help of pliers wrap it around itself for about 12 cm. Cover the branch with brown cotton, working the chains around it. Every 20 chains insert a copy of leaves using the chain that is between one leaf and another. Go on like this until you cover the whole branch except about 2 cm per side which will be used to connect the secondary branch to the main branch.
Also cover the secondary branch with the bud in the same way.
Make all the secondary branches both with the bud and without, the fruits and flowers needed for your pomegranate plant.
For the main branch, cut a piece of plasticized wire of the length and thickness suitable for the work being carried out. Using a pair of pliers, bend a point twice to form a knot. Start the chains with brown cotton right there to cover the branch. Make 20 chains and insert a copy of leaves, after the fourth copy of leaves fasten a secondary branch.
Continue with the chains and other 4 copies of leaves, tie another twig with the bud and a few flowers. Other chains with copies of leaves, fasten the fruit and another twig and 2-3 more copies of leaves.
Once the three main branches are made, join them at the bottom and around 4 cm work around the chains, thus creating a single branch. The remaining 3 cm is not necessary to cover them as they will be inserted inside the vase.
To cover the knot on the top of the main branch make a small onion and sew it on.
Explanation of the dome
Start 4 chains and in the first make 9 double crochet (total 10).

Mold everything with your hands and if you need to starch a little the petals of the flowers and the tips of the pomegranate.
Insert the seedling thus created in the center of the pot and decorate it all around with a few dry leaves and a blade of grass.
Of course you can always modify and personalize your pomegranate seedling which I hope I have explained to you better.
I wish everyone good creation.
See you soon. Bye.


This is beautiful! Your creations are always so faithful to nature!
RispondiEliminaThanks for sharing!
Hi Bella, you are very kind. Thank you so much for the compliments.
RispondiEliminaQuesto commento è stato eliminato dall'autore.
RispondiEliminaQuesto commento è stato eliminato da un amministratore del blog.
RispondiElimina